The most asked and useful question about Fiverr is how to post a gig on Fiverr. So that you can start getting orders on Fiverr and in return money.
Here in this post, I’ll show you the detailed step by step guide to creating a new gig. Here I’ll also share all time proven strategies used by a lot of successful freelancers.
So just stay tuned and read out this full blog post.
Steps to create a Gig:
Fiverr is the most used and trending freelancing platform on the internet. There are a lot of those entrepreneurs that are just using Fiverr to run their startups.
There are also huge freelancers that offering their digital services to the whole world remotely. This is the main reason why Fiverr is very popular especially among freelancers.
Every day hundreds of new freelancers start on Fiverr to earn money by offering their services. If you also want to start offering your services, you must need a gig on your profile.
Here are the exact steps that you need to start creating a gig that drives more sales.
1. Create an Account on Fiverr
Before start to posting a gig on Fiverr, you need to Fiverr an account. This is where you can post your gig, chat with clients, and many more.
Don’t worry, it doesn’t charge for account creation, Fiverr charge on every successful sale. Therefore anyone from anywhere (where Fiverr is available) can create his account for free.

Here are the steps you need to take for account creation.
- E-Mail Account: Fiverr need an E-Mail address to account on their website. This is E-Mail will be linked with your profile and you’ll be notified of all alerts. So if you don’t have an E-Mail account then you create one on Gmail for free. It will take just a few minutes to get an Email from Gmail.
- Fiverr Sign up: Once your Email account is ready then you can proceed to sign up on Fiverr. To create an account, you just have to go to the signup page. Here just enter your E-Mail and password. Within few seconds, you’ll receive an Email from Fiverr for the verification. Once you verify your email, your account will be ready to use.
- Profile Step-Up: Once your account is ready. Next, you need to step up your profile. Although, you can create your gig without step up your profile. But your gig will get zero buyer attention because your profile has in-complete data.
Recently, I’ve published a complete blog post to create a Fiverr account from scratch. So I recommend you to check this post too.
2. Choose a Niche
At this step, you have to ready your account and complete your profile. You know there is a huge competition and more than 500 services categories and niches on Fiverr.
Now you’ve to find a service that matches your interest and also has less completion in it. I recommend you to rather than going for a broad category (Topic) go with a small category (niche). So that you don’t face huge competition at your initial growing stage.
A niche is a subset or a small part of a big topic or a large market. Nowadays, every freelancer starts from a niche because of low competition and more conversions.
Here are the exact steps that you need to take to choose a niche.
- Brainstorm your expertise: At the 1st step, note down all the main categories on which you’ve knowledge or expertise. You can also take help from your friends or family.
- Choose a Niche: As you ready with the list then you’ve to them on Fiverr. You’ve to check them one by one, are these categories available on Fiverr. You continue this process until you find two or more topics of your expertise.
- Analyze Competitors: Now you have to search every final topic into Fiverr. And then analyze your competitors and find out low competition keywords.
- Find Problem in this Niche: Now you’ve low competition topics to create a gig. But if you get more than one topic then you’ve to choose one that solves more problems.
I recommend you to check out my blog posts to find a Fiverr niche.
3. Create a gig on Fiverr:
Now you have got a Fiverr account and a niche for your gig. So let’s move towards posting a new gig on Fiverr.
If you’re gig unique and offer pro features then there will higher chance to get more orders.
Step1: Overview
To create a new gig, just go to the gig page from the dashboard of your profile. Then click on create a new gig button on the middle right of the page in green color.
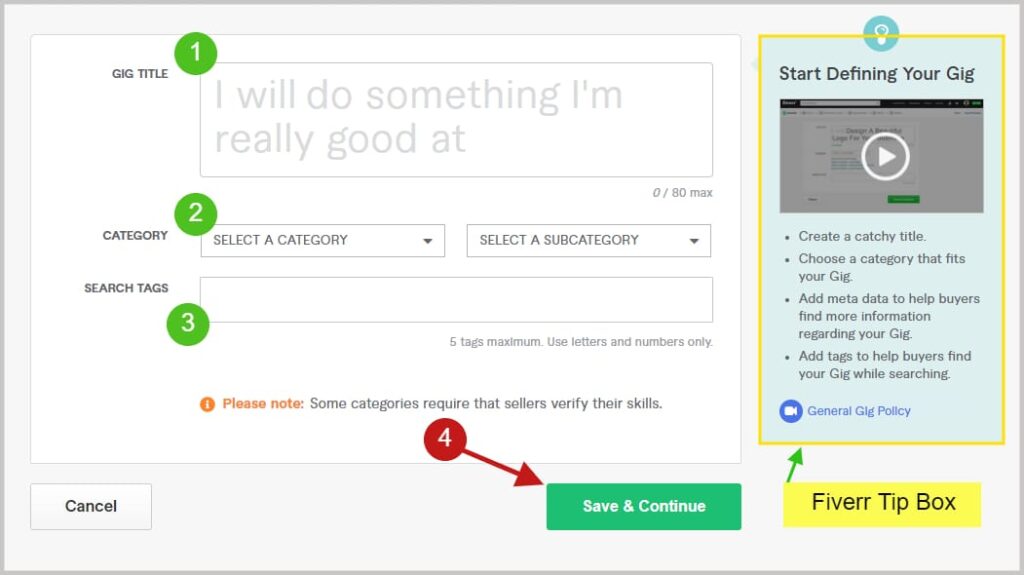
Next, it will open a page from where you can start entering the details of your niche. On this page, you’ll be asked to choose a title, category, tags, and service details (depending upon your niche).
Gig Title: Fiverr gig title is the very important and most displayed point of your gig. So you’ve to create a unique title that solves the buyer’s problems.
You can brainstorm more than two titles from your own perspective. Then you can choose one that satisfies your needs.
In addition, you can’t write a title that is below 15 characters and higher than 80 characters. So you have to maintain the length of your title while choosing a title.
I also recommend you to check out my complete guide on writing a gig title.
Category: After gig title, you’ve to choose a category and then sub-category for your gig. As you write your title, Fiverr will give you a few categories depending upon the title. However, you can also choose your own category if you’re satisfied with Fiverr.
It is very to choose the right category for your gig. If you choose the wrong category then you’ve to face a lot of trouble in ranking, buyer requests, and many more.
Tags: In this step, you have to choose tags for your category. These tags play an important role to get ranking on Fiverr. So I highly recommend you to choose your tags wisely.
One more thing, you’ve to enter your main keyword in your tag. This will helps Fiverr to understand what is the topic of your gig.
After completing all the steps, you’ve to click the save & continue button.
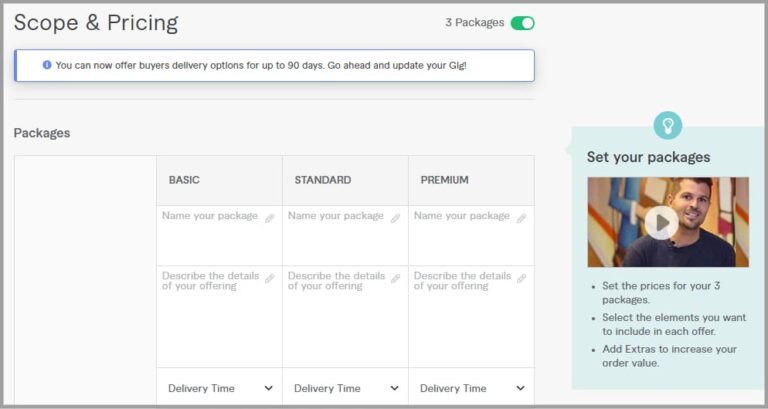
Step2: Pricing
At this step, you’ve to decide the different types and prices for your gig. This step is very important to get orders from the buyers.
Therefore you’ve to choose every point carefully to avoid the trouble of not getting orders. Here is how you can choose these points;
Number of Packages: At the 1st point, you’ve to decide how many packages you want to add to your gig. Fiverr give you an option whether you can choose 3 packages or one package.
It’s all depends on you and your niche how many packages to add. But I recommend you add three packages because buyers can easily pick one depending upon their needs.
Package Name: Next you’ve to give the name to your packages. So if you choose one package then you’ll choose one name. Otherwise, you’ve to give three names to your every package.
Package Features: Then you’ve to write the features of every package. Every package will have different features and results depending upon the price.
Revisions: At this point, you need to configure how many revisions you’ll give to your buyers. Every package will also have a different number of revisions. So you can decide the number of revisions usually most of the freelancers offer up to unlimited revisions.
Delivery Time: Here you’ve to decide how many days you’ll need to complete this order. It may differ from every package because a higher price package needs more work. So you also need more time to complete this.
Price: The most important point of a gig is the price of your gig. You can’t charge a too high or too low a price for your service. Because buyers will not trust you and they will not buy from you. However, you can get help from your competitors to decide on a unique price for your packages.
Extra Options: This is an optional point, Fiverr gives you an option to give some extra features for the extra amount. Here you can offer extra services like the number of revisions, delivery time, etc. to charge more from the buyer.
After completing all the steps, you’ve to click the save & continue button.
Step3: Description & FAQ
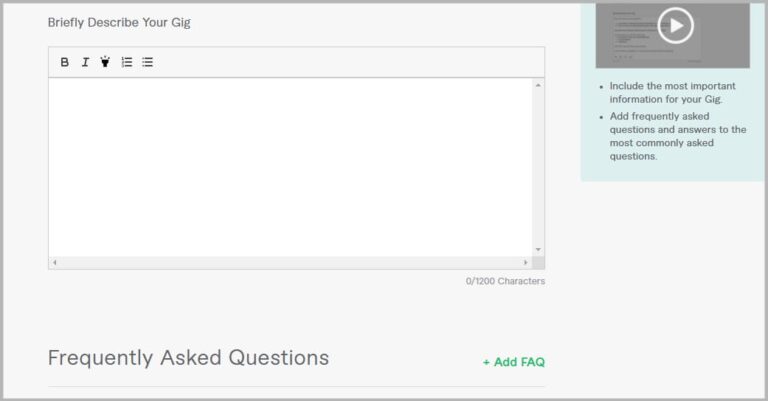
The description is also a very important step to create a gig on Fiverr. This is the point where all of your buyers will land and covert into your regular customers.
Here you’ve to briefly explain your service, its features, and your experience. So that you can convert more and more people into your customers.
According to Fiverr, you’ve to write a minimum of 20 characters and a maximum of 1200 characters in your gig description. In addition, you can also use text highlighter and text bold feature to highlight some important features of your gig.
I also recommend you to check out my in-depth guide on Fiverr gig description.
After gig description, you’ve to write the FAQ (frequently asked question) about your gig. This is optional, but if you’re in a niche where buyers have questions in their minds for your service.
Then I highly recommend you answer all these questions and relate them to your service. This way your chances of getting orders will also start to grow.
Step4: Requirements
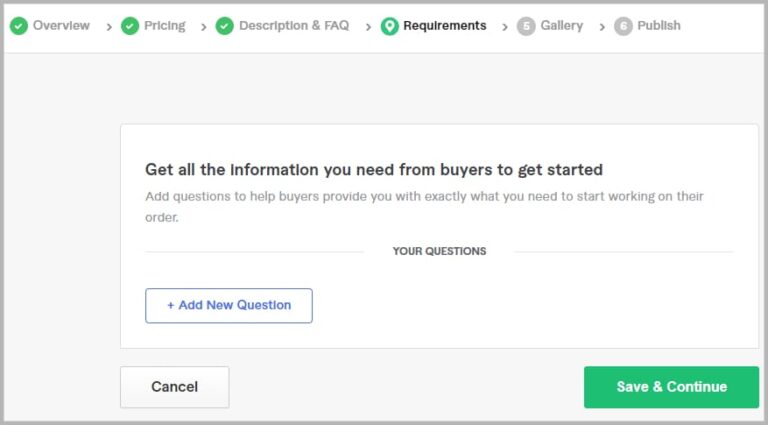
In this step, Fiverr will ask you what are requirements you want from your buyer. This step is very important to get the buyer’s attention by fulfilling their needs.
Here you’ve different options to get these requirements from your buyers. You can use questions, file uploads, or simple text depending upon your niche.
Once you’ve done with the requirements then a buyer will not be able to place an order without having these details.
After completing all the steps, you’ve to click the save & continue button.
Step5: Gallery
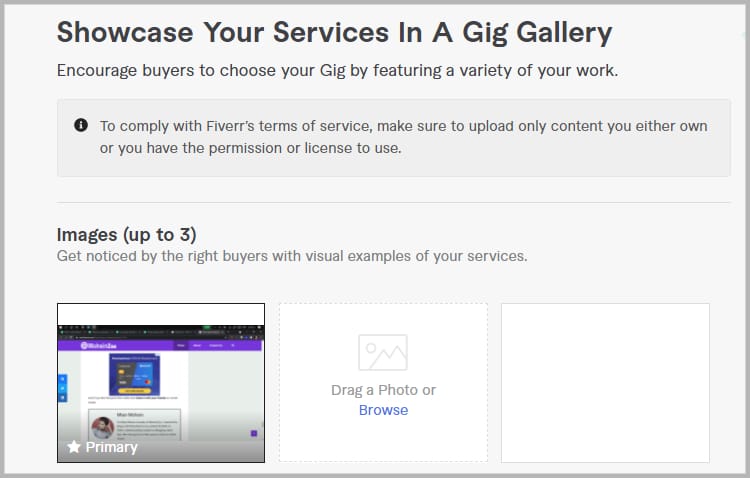
The last but most important point after the gig title is the Fiverr gig gallery. Fiverr gig gallery is very important because this is the most prominent part of your gig.
In the Fiverr gallery, you can add video, images, and PDF files to your portfolio. But images are the most used elements of the gallery.
Fiverr offer a seller to add 3 images (max 5MB each) into a gig with a size of 550 by 370 pixels. So you have to create your images according to these requirements. I also recommend you to read my recent post on Fiverr gig images.
After completing all the steps, you’ve to click the save & continue button.
Step6: Hit Publish
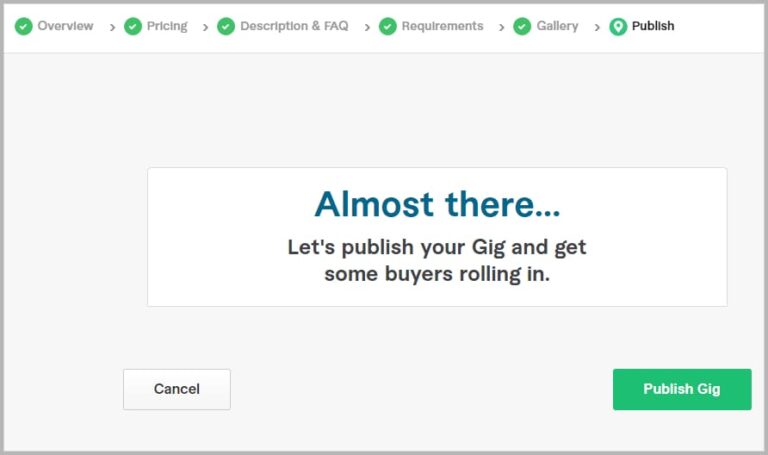
At this you’ve completed every step from overview > pricing > description > requirements > gallery.
Now you have to publish your gig on Fiverr. So that your gig can list in the Fiverr search results and buyers can find your gig. And if buyers like your gig and the features you offering then they will place the order.
That’s all. Now you have created a new gig on Fiverr and you can repeat this process for future gigs too.
4. Promote Gig on Social Media:
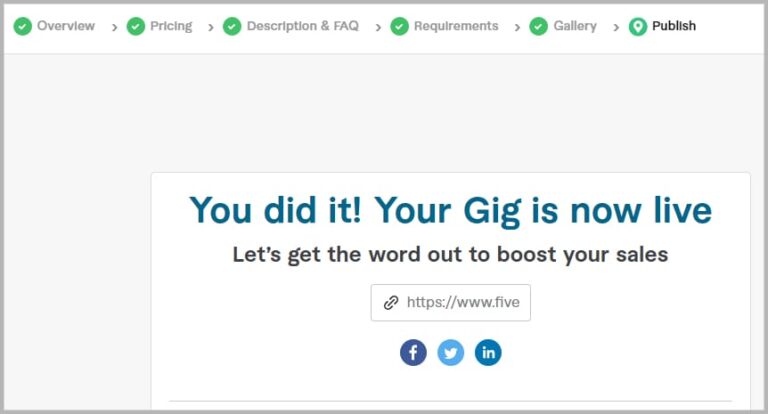
As you publish your gig, you have to start promoting it within your network. So that you can get initial clients as soon as possible.
There is a lot of medium where you can promote your gig. You use Facebook, Instagram, Twitter, and forums related to your niche. You can also use a local network like friends, family, and group circles to get initial orders.
Once you got your initial clients, Fiverr will start noticing your gig and promote your gig in the search results. Then your gig will start to reach more and more buyers and you’ll also start getting orders.
Conclusion:
This is all about how to post a gig on Fiverr from start to finish. Hope you got to know the complete gig creation process and tactics involved while creating it.
If still, you have any confusion while creating a gig then feel free to mention your problem in the comment section. I’ll be happy to help you.
Last if you found something interesting in this post that doesn’t forget to share it with your friends on social media.